Well, a lot goes into capturing those stunning astrophotos and I'll probably touch on these factors at some point in the future. Today, I'll talk about the most crucial aspect of getting good astrophotos through a telescope: good polar alignment (aligning the mount to astronomical North).
Everyone knows that the Earth spins on its axis once a day, that's why the Sun, Moon, and stars appear to rise and set. So, with the celestial objects moving across the sky, it is absolutely crucial to accurately track them to compensate for the Earth's rotation. Any tracking inaccuracy will result in streaked, not perfectly round stars.
So, how does one go about this?
Traditionally, one gets accurate polar alignment through use of a polar scope (pain in the neck) or by using the latest computer-equipped telescope mounts (expensive). At the time I got started, a go-to mount was out of the budget and Polaris was (and still is) blocked by trees.
There had to be another way, and there was.
Step 1: Find Local Noon
Noon isn't noon (unless you live right on a time zone border), sorry. To find when the Sun is directly due South, just google it. To make things easier, here is a place where you can find your local noon:
timeanddate.com
Step 2: Get Prepared
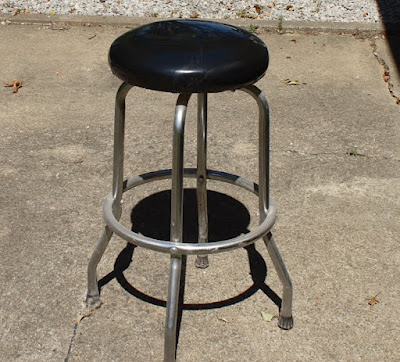
Time of local noon found, wait for it to come, but in the meantime, find something that stands up straight. For me, this stool worked just fine. You'll also need a yardstick and something to write on the ground with.

Step 3: Mark the North-South Line
When local noon arrives, set up your object and trace the line of its shadow on the ground

Step 4: Extend the Line
Chances are, the line you draw on the ground won't be long enough to set up a telescope mount, so take the yardstick and extend the line so that it is big enough to cover the spread of your tripod's legs.

Step 5: Setup (in real life, do this at night)
Dark having arrived, haul out your scope and set the North leg of the tripod directly on the line. Next, spread the back legs so that they are about an even distance from the line.


Step 6: Measure
To get accurate alignment, be sure to measure so that the back legs are the exact same distance from the North-South line.
Step 7: Level
Don't forget to check that you are level. An off-level mount will offset perfect polar alignment every time. If you're lucky, your mount will have a built-in level(s) like my Meade LXD-55.

While You're At It . . .
You've made it this far, so why not learn how to attach your camera to a telescope, too?
And For That Matter . . .
If you attach your camera to a telescope, you can also use it as a regular photographic lens!
Step 8: Test
All set up, it's now time to test. Set your camera for 30 seconds and take a few practice shots with the self-timer engaged or with a remote control as vibrations from touching the camera/scope rig can look just like star trailing caused from bad polar alignment.
Author's Note:
I know this isn't the most advanced (it dates from the Stone Age!). method to get accurate polar alignment. However, for people using short focal length scopes (my Orion ED80 is 600mm long) and who are looking to stack short exposures in the realm of 30 seconds to a minute, this method should work every time as it has done for me going on four years now.
Good luck!
Like What You Just Read?
Why not check out other great stuff
about photography,
astronomy,
associated
gear, and how
to use it.
Think someone else would find this informative (or at least entertaining)? Use the buttons below to share!
Think someone else would find this informative (or at least entertaining)? Use the buttons below to share!


No comments:
Post a Comment